Zona Arcade. Construye, Restaura y Decora tu Máquina Arcade y Pinball.

Tutorial "GlovePIE": Juega a MAME y a otros emus con tus mandos de consola "Wii"

« Older   Newer »
  Share  
view post Posted on 6/8/2011, 16:16     +1   -1
Avatar

Restless in Peace

Group:
Administrator
Posts:
42,839
Location:
Alcobendas (Madrid)

Status:


Tutorial "GlovePIE": Juega a MAME y otros emuladores con tus mandos de consola "Wii"

Si hay una cosa que siempre me ha gustado de Nintendo son los gamepads que diseñan. Los de Nes y SMS están a años luz en cuanto a precisión, con el de snes "inventaron" nuevas posibilidades con los “gatillos L y R” (copiado por los demás fabricantes), el apartado analógico de los mandos de n64 y GC es impecable (ya les gustaría a los pads de Xbox y PS3 ser tan precisos) y, cuando los otros se pegaban de leches para ver quién sacaba una bestia parda, Nintendo desvió la guerra otra vez a su terreno creando los mandos más espectaculares hasta la fecha (otra vez copiados), los “Wiimote”, brindando al jugador la posibilidad de enviar info a la consola de diferentes maneras: véanse los habituales pad analógico y digital, los sensores del giroscopio y del acelerómetro, y los infrarrojos con la barra sensora.

tutoglovepiewiimote

Un buen día vi en youtube un vídeo de un tío que utilizaba el “Wiimote” a modo de ratón y fue una de las cosas que quise experimentar... Buscando información, descubrí un programa llamado “Glovepie” que nos permite trasladar la información emitida por nuestro Wiimote a nuestro PC y convertirlos en inputs de nuestro teclado para así poder controlar infinidad de programas, además de utilizarlos como gamepads para darle al vicio.

¿Qué pasa si mezclamos GlovePIE + MAME? Pues puede pasar de todo: Podemos usar los mandos de nuestra Wii a modo de lightgun para los juegos de disparos, aprovechar el acelerómetro y el giroscopio para convertir nuestro mando en volante y flipar con los juegos de conducción; usarlos como mandos adicionales y así poder echar viciadas a 4 players en nuestras maquinas arcades, etc.

tutoglovepiemamea


- ¿Qué es ”GlovePIE™”?

GlovePIE (Glove Programmable Input Emulator): Originalmente fue creado para emular un joystick o teclado usando el "Essential Reality P5 Glove" (unos guantes de Realidad Virtual). Ahora soporta y emula sistemas de todo tipo: Neurosky ThinkGear, Wild Divine Lightstones, Emotiv Epoc, Wiimotes (Wii Remotes), Wii Fit Balance Boards, PlayStation 3 controllers (SIXAXIS, Dual Shock 3), Spaceball, Novint Falcon, eMagin Z800, Essential Reality P5 Virtual Reality Glove, 5DT Data Glove, Flock of Birds tracker, Polhemus trackers. Yo lo utilizo para jugar a mis juegos preferidos con el mando de la Wii.

Podemos bajarnos GlovePIE de manera gratuita desde su página web (aunque encontrar el enlace es algo lioso. Carl Kerner defiende la energía 100% Verde y para poder usar su programa recomienda ser verdes 100%). La última versión lanzada es la 0.43 del 21 enero del 2010. He puesto el enlace directo a la última versión sin soporte para Emotiv Epoc (interface de interpretación de pulsos neuronales para PC), ya que nosotros la vamos a usar para los Wiimote.

tutoglovepiegpicon


- Conexión del Wiimote al PC

Para que todo esto funcione primero debemos "conectar" el Wiimote al PC y o bien nuestro PC tiene un adaptador bluethooth integrado, cosa que pasa en el caso de los imac (ya sé que eso no es un PC pero es lo que tengo en casa), o necesitaremos un adaptador bluetooth USB y un programa tipo “bluesoleil” (explicado fantásticamente Por Akilex500 en este post de Mikonos), que es el que se encarga de gestionar la conexión (en el caso del imac no hace falta el programa usaremos el que nos proporciona bootcamp). Luego vamos a la pestaña "Mi bluetooth" y seleccionamos "Búsqueda de dispositivo bluetooth". Obviamente, mientras esté buscando, cogemos nuestro Wiimote y le quitamos la tapa y le damos al botón Sync. Tendría que detectarlo como "Nintendo RVL-CNT-01". Una vez el PC haya detectado el Wiimote, cargamos el Glovepie con el script que necesitemos y ¡¡¡a jugar!!!

tutoglovepiebticon

He leído que en la versión 0.43 de GlovePIE gestiona el “Stack Bluetooth de Microsoft”. O sea, que pulsando el botón “Sync” se conecta automáticamente. Todavía no lo he podido comprobar, ya que tengo el ordenador pendiente de meterlo en la maquina y la versión que he usado hasta ahora era la 0.29.


- Scripts de ”GlovePIE™”?

Para crear un script, algo tan fácil como abrir un documento de texto con el bloc de notas de Windows y cambiar la extensión “.txt” por “.pie”. Sabiendo esto, podemos empezar a crear nuestros scripts fácilmente, para ello solamente debemos tener en cuenta que: “Botón del Wiimote = Tecla del teclado”. Esto nos solucionará gran parte de nuestras necesidades (tanto para jugar con Mame como juegos arcade para PC), pero, si queremos, podemos aprovechar tanto las capacidades del acelerómetro como la tecnología IR, para ello necesitaremos crear o adaptar una wiibar para usar el puntero.

En el ejemplo script para el emulador “snes9X 1.53” basado en la configuración por defecto del input 1 del emulador una vez tengamos el Wiimote conectado al PC:

SPOILER (click to view)
/////////////////////////////////
// Snes9X v.153 - Glopie //
// By Lasthome //
/////////////////////////////////

// Cruceta de dirección
///////////////////////

Wiimote.Right = Up
Wiimote.Left = Down
Wiimote.Up = Left
Wiimote.Down = Right

// Botones
/////////////

Wiimote.One = C // Botón B snes
Wiimote.Two = V // Botón A snes
Wiimote.Minus = X // Botón Y snes
Wiimote.Plus = D // Botón X snes
Wiimote.A = Space // Botón Start
Wiimote.B = Enter // Botón Selct
A = Wiimote.RawForceZ <= -10 // Botón L
S = Wiimote.RawForceZ >= 10 // Botón R


snesc


- Programación del Wiimote

Para empezar a programar scripts en GlovePie y usar nuestro Wiimote en el PC, lo primero que debemos conocer es cómo se llama cada tecla del Wiimote. A continuación os dejo una lista de las teclas.

Cruzeta
Wiimote.Up = Up
Wiimote.Down = Down
Wiimote.Left = Left
Wiimote.Right= Right

Botones
Wiimote.A = A
Wiimote.B = B
Wiimote.Minus = -
Wiimote.Plus = +
Wiimote.Home = Home
Wiimote.One = 1
Wiimote.Two = 2

Estos valores se corresponden si usamos el mando en posición vertical (mando azul). En el caso que queramos usar el Wiimote como un mando clásico para jugar a juegos 2D tendríamos que asignar los valores apropiados. Es decir, usaríamos el mando en posición horizontal (mando negro) y, aunque Glovepie es capaz de detectar la posición del mando mediante el acelerómetro y el script apropiado, es mucho más fácil extrapolar los valores de los botones del Wiimote a los nuevos valores del teclado así, como se ve en el dibujo.

tutoglovepiecontrols


- Programación del Acelerómetro

Otra de las peculiaridades del mando de la Wii es el uso de acelerómetros para su ubicación espacial, enviando unos valores a la consola dependiendo de su inclinación o movimientos que hagamos, y Glovepie es capaz de interpretar estos valores.

Wiimote.RawForceX
Wiimote.RawForceZ
Wiimote.RawForceY

Estos valores controlan la inclinación de los distintos ángulos del wiimote y varian según se posicione el mismo, estos valores se programan de manera similar a los botones.

tutoglovepieejes

Controlar juegos tipo “Out Run” o “Mario kart 64” con el volante de la wii es posible gracias a un script un poco más elaborado:

SPOILER (click to view)
//Mario Kart N64 controls
//By petergriffin and TweaK Edited by duksandfish3

var.zCutoff1 = 6/30
var.zCutoff2 = 12/30
var.zCutoff3 = 23/30
// Hold the controller sideways like you do in Exite Truck 1 is A, 2 is B
// And Right (or Up if held sideways) is use item. Steering is as simple as
// Turning the Wiimote right or left. Home is Start. Plus is up and minus is //down
// A is R and B is L
// Set the Emulator so that A=A B=B Z=Z Start=S R=R L=L And the Directions set to the arrow keys
var.xRot =Wiimote.gx
var.yRot =Wiimote.gy
var.zRot =Wiimote.gz

debug = 'X:' + var.xRot + ', ' + 'Y:' + var.yRot + ', ' + 'Z:' + var.zRot

if var.zRot > var.zCutoff3 then
key.right = true
key.left = true
key.left = false
wait 20ms
key.right = false
else if var.zRot < -var.zCutoff3 then
key.left = true
key.right = true
key.right = false
wait 20ms
key.left = false
else if var.zRot > var.zCutoff2 then
key.right = true
key.left = true
key.left = false
wait 12ms
key.right = false
else if var.zRot < -var.zCutoff2 then
key.left = true
key.right = true
key.right = false
wait 12ms
key.left = false
else if var.zRot > var.zCutoff1 then
key.right = true
key.left = true
key.left = false
wait 2ms
key.right = false
else if var.zRot < -var.zCutoff1 then
key.left = true
key.right = true
key.right = false
wait 2ms
key.left = false
else
key.left = True
key.right = True
key.left = false
key.right = false
endif

key.a = Wiimote.2
key.z = Wiimote.a
key.s = Wiimote.Home
key.up = Wiimote.Plus
key.down = Wiimote.Minus
key.r = Wiimote.b
key.l = Wiimote.right
Wiimote.leds = 9

//Reversing
if wiimote1.1 = true
Key.b = 1
Down = 1
endif

if wiimote1.1 = false

key.b = 0
down = 0

endif


tutoglovepieconducir

Con este script tendremos el control del vehículo inclinando el mando hacia los lados y hacia delante y atrás. Por supuesto, tendremos que coger el mando como en la foto de continuación.

tutoglovepievolante


- Programación IR

El Wiimote consta de un sensor infrarrojo frontal que "lee" los haces de luz que envían los leds instalados en la “Wiibar” (erróneamente se le llama barra sensora) y los envía a la consola Wii mediante bluetooth, que es la que se encarga de triangular nuestra posición y así poder usar el mando a modo de "puntero".

mouse.x = wiimote.PointerX
mouse.y = wiimote.PointerY

Con este pequeño script seríamos capaces de controlar el puntero del ratón, pero para poder jugar a los juegos de disparos del MAME necesitamos de un script más elaborado con calibración del Wiimote:

SPOILER (click to view)
//****************************************************************************
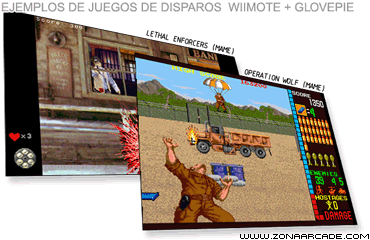
//GlovePIE WiiMote Script for Operation Wolf style games in MAME
//Ted Spinks, [email protected], updated 1/29/2009
//DIRECTIONS: In MAME, enable Joystick support. Uses joystick input instead of
// mouse input in order to allow 2 players/wiimotes, so PPJoy must be installed
// and configured with 2 virtual joysticks (picking all default mappings is fine).
// PPJoy can be downloaded from www.geocities.com/deonvdw/PPJoy.htm
//Testing: Azio USB Blootooth (Toshiba stack), Nyko wireless sensor bar, MAME 104
//Features: uses both sensor bar dots for a wider "target area", has good roll
// compensation, supports 2 players/WiiMotes, and the LED's indicate battery
// charge % when you press Home.
//****************************************************************************


//***************************** Table of Contents *****************************
//Global WiiMote Calibration
//P1 Process WiiMote Home button and set WiiMote LED's
//P1 Button Inputs
//P1 Pre-Process Sensor Bar Dots
//P1 Get Left and Right Sensor Bar Dots
//P1 Calculate the MidPoint and assign Joystick input
//P2 Process WiiMote Home button and set WiiMote LED's
//P2 Button Inputs
//P2 Pre-Process Sensor Bar Dots
//P2 Get Left and Right Sensor Bar Dots
//P2 Calculate the MidPoint and assign Joystick input
//*************************** End Table of Contents ***************************


//*********************** Global WiiMote Calibration *************************
//Set the sensitivity level of the WiiMote. These values must be at least 1.
var.SensitivityX = 1.0 //Sensitivity multiplier for X axis
var.SensitivityY = 2.0 //Sensitivity multiplier for Y axis

//Adjust these values to shift the borders of the "target area" if needed.
// For example, you could shift the top or the bottom border to compensate
// for the position of your sensor bar (I didn't need to though).
var.ShiftLeftSide = 0 //+ to shift right, - to shift left
var.ShiftRightSide = 0 //+ to shift right, - to shift left
var.ShiftTop = 0 //+ to shift down, - to shift up
var.ShiftBottom = 0 //+ to shift down, - to shift up

//Leave these values alone.
// 1023 and 767 are the max X and Y dot values that the WiiMote can sense
var.BeginRangeX = 0 + var.ShiftLeftSide
var.EndRangeX= 1023 + var.ShiftRightSide
var.BeginRangeY = 0 + var.ShiftTop
var.EndRangeY = 767 + var.ShiftBottom
var.RangeSizeX = var.EndRangeX - var.BeginRangeX
var.RangeSizeY = var.EndRangeY - var.BeginRangeY

//Set the midpoint compensation factor.
// Since the range of the mindpoint's of the 2 sensor bar dots is approx 1/3 of
// the combined ranges of the original 2 dots, after we calculate the midpoint
// we have to fix its value range by multiplying by 3.
// To figure out the 1/3 I just watched "debug = var.P1MiddleDotX" as I moved
// the WiiMote left and right.
var.MidpointMultiplierX = 3
//********************** End Global WiiMote Calibration ************************


//*********** P1 Process WiiMote Home button and set WiiMote LED's *************
//Normally Led 1 is lit to indicate this is wiimote #1,
// but when Home button is pressed the LED's display battery charge
if Pressed(wiimote1.home) then //Do this once when the button is first pressed
//Calculate and display battery charge %, full battery is 0xC0 (192)
var.P1Battery = Round( 100*wiimote1.battery/192 )
Say "Battery at " + var.P1Battery + " percent"
endif
if wiimote1.home then
var.P1Flash = !var.P1Flash
wiimote1.Led1 = var.P1Flash
If var.P1Battery > 35 then
wiimote1.Led2 = var.P1Flash
else
wiimote1.Led2 = False
endif
If var.P1Battery > 60 then
wiimote1.Led3 = var.P1Flash
else
wiimote1.Led3 = false
endif
If var.P1Battery > 85 then
wiimote1.Led4 = var.P1Flash
else
wiimote1.Led4 = false
endif
wait 100 ms //Increasing this will slow down the LED flash speed
else
wiimote1.Led1 = True
wiimote1.Led2 = False
wiimote1.Led3 = False
wiimote1.Led4 = False
endif
//*********** End P1 WiiMote Home button and set WiiMote LED's *************


//**************************** P1 Button Inputs *****************************
// (see above for Home button behavior)
key.LeftControl = Wiimote1.B
//key.B = Wiimote1.B
key.LeftAlt = Wiimote1.A
//key.E = Wiimote1.A
key.One = wiimote1.Plus
key.Five = wiimote1.Minus
key.P = wiimote1.Down
key.left= wiimote1.left
key.right= wiimote1.right
//************************** End P1 Button Inputs ***************************


//********************** P1 Pre-Process Sensor Bar Dots ***********************
//For each sensor bar dot:
//1) Convert the sensor bar dots from the wiimote's range of values to a standard
// four quadrant setup with the origin (0,0) in the center. This is needed for
// the rotation formula in #2.
//2) Do roll compensation for both dots by running them through rotation formula.
//3) Convert the dots to standard joystick input range (-1 to +1)
//Note: #3 must happen AFTER #2. The native sensor bar dot ranges have the X
// and Y ranges at a ratio of about 4:3. Since #3 stretches the Y out and makes
// the ratio 1:1, we have to do this after #2, otherwise it will skew the
// rotation formula.

//get the WiiMote's Roll degrees once
var.P1Angle = -1 * smooth(wiimote1.smoothroll, 5, 5)

//dot1
if wiimote1.dot1vis then

//Shift the dot1 so that its range starts at 0.
// Note, this will only have an effect if you adjust the borders of the
// target area at the top of the script (i.e. if you change them from 0's)
var.P1Dot1X = wiimote1.dot1x - var.BeginRangeX
var.P1Dot1Y = wiimote1.dot1y - var.BeginRangeY

//Reverse the X and Y values to make the coordinates standard
// Note: the WiiMote's dot coordinates are reversed (numbers get larger to
// the left and down), so I subtract them from the max X and Y values in
// order to flip them.
var.P1Dot1X = var.RangeSizeX - var.P1Dot1X
var.P1Dot1Y = var.RangeSizeY - var.P1Dot1Y

//Now adjust X and Y value ranges so that the origin (0,0) is in the center
// this is needed for the rotation formula below, because it rotates points
// around the origin.
var.P1Dot1X = var.P1Dot1X - (var.RangeSizeX/2)
var.P1Dot1Y = var.P1Dot1Y - (var.RangeSizeY/2)

//Compensate for roll; I used 2D rotation equations to rotate each
// dot around the origin. http://en.wikipedia.org/wiki/Rotation_(mathematics)
// Note: every web page I found on the formulas below said they are for
// clockwise rotation, but when I put in some test values, they actually
// rotate counter clockwise.
if var.P1Angle <> 0 then
var.FixedP1dot1X = cos(var.P1Angle)*var.P1dot1X - sin(var.P1Angle)*var.P1dot1Y
var.FixedP1dot1Y = sin(var.P1Angle)*var.P1dot1X + cos(var.P1Angle)*var.P1dot1Y
else
var.FixedP1dot1X = var.P1dot1X
var.FixedP1dot1Y = var.P1dot1Y
endif

//Now convert dot1's range to (-1 to +1)
// just used good old unit conversion math here
var.FixedP1Dot1X = var.FixedP1Dot1X * (2 / var.RangeSizeX)
var.FixedP1Dot1Y = var.FixedP1Dot1Y * (2 / var.RangeSizeY)
endif

//dot2
if wiimote1.dot2vis then

//Shift the dot2 so that its range starts at 0.
// Note, this will only have an effect if you adjust the borders of the
// target area at the top of the script (i.e. if you change them from 0's)
var.P1dot2X = wiimote1.dot2x - var.BeginRangeX
var.P1dot2Y = wiimote1.dot2y - var.BeginRangeY

//Reverse the X and Y values to make the coordinates standard
// Note: the WiiMote's dot coordinates are reversed (numbers get larger to
// the left and down), so I subtract them from the max X and Y values in
// order to flip them.
var.P1dot2X = var.RangeSizeX - var.P1dot2X
var.P1dot2Y = var.RangeSizeY - var.P1dot2Y

//Now adjust X and Y value ranges so that the origin (0,0) is in the center
// this is needed for the rotation formula below, because it rotates points
// around the origin.
var.P1dot2X = var.P1dot2X - (var.RangeSizeX/2)
var.P1dot2Y = var.P1dot2Y - (var.RangeSizeY/2)

//Compensate for roll; I used 2D rotation equations to rotate each
// dot around the origin. http://en.wikipedia.org/wiki/Rotation_(mathematics)
// Note: every web page I find on the formulas below said they are for
// clockwise rotation, but when I put in some test values, they actually
// rotate counter clockwise.
if var.P1Angle <> 0 then
var.FixedP1dot2X = cos(var.P1Angle)*var.P1dot2X - sin(var.P1Angle)*var.P1dot2Y
var.FixedP1dot2Y = sin(var.P1Angle)*var.P1dot2X + cos(var.P1Angle)*var.P1dot2Y
else
var.FixedP1dot2X = var.P1dot2X
var.FixedP1dot2Y = var.P1dot2Y
endif

//Now convert dot2's range to (-1 to +1)
// just used good old unit conversion math here
var.FixedP1dot2X = var.FixedP1dot2X * (2 / var.RangeSizeX)
var.FixedP1dot2Y = var.FixedP1dot2Y * (2 / var.RangeSizeY)

endif
//******************** End P1 Pre-Process Sensor Bar Dots *********************


//****************** P1 Get Left and Right Sensor Bar Dots ********************
if wiimote1.dot1vis and wiimote1.dot2vis then
//Both sensor bar dots are visible

//Figure out which sensor bar dot is left and which is right
if var.FixedP1Dot1X < var.FixedP1Dot2X then
//the left dot must be dot1, and the right dot must be dot2
var.P1LeftDotX = var.FixedP1Dot1X
var.P1LeftDotY = var.FixedP1Dot1Y
var.P1RightDotX = var.FixedP1Dot2X
var.P1RightDotY = var.FixedP1Dot2Y
else
//else the left dot must be dot2, and the right dot must be dot1
var.P1LeftDotX = var.FixedP1Dot2X
var.P1LeftDotY = var.FixedP1Dot2Y
var.P1RightDotX = var.FixedP1Dot1X
var.P1RightDotY = var.FixedP1Dot1Y
endif

var.P1LastMidpointX = (var.P1LeftDotx + var.P1RightDotx)/2
var.P1PointedOnScreen = True

//Save the previous distance (for use in the safety check below)
var.OldP1DistBtwDots = var.P1DistBtwDots

//Whenever both dots are visible calculate the distance between them
var.P1DistBtwDots = var.P1RightDotx - var.P1LeftDotx

//Make sure one of the dots didn't just disappear; if it did then
//throw away this data. After a dot has just disappeared and has
// stopped updating its X value, it may still register as visible
// for a split second; I've seen this cause the distance to be
// recorded at around 30. Weird.
if !(wiimote1.dot1vis and wiimote1.dot2vis) then
var.P1DistBtwDots = var.OldP1DistBtwDots
var.P1PointedOnScreen = false
endif

elseif wiimote1.dot1vis and (var.P1DistBtwDots > 0) then
//Only dot1 is visible, so we'll calculate a position for dot2
// Note, (var.P1DistBtwDots > 0) will be true as long as both dots have
// been visable at least once.

//Figure out if this is the left or the right dot
if (var.FixedP1Dot1X < var.P1LastMidpointX) then
//dot1 must be the left dot
var.P1LeftDotX = var.FixedP1Dot1X
var.P1LeftDotY = var.FixedP1Dot1Y
var.P1RightDotX = var.FixedP1Dot1X + var.P1DistBtwDots //simulate right dot
var.P1RightDotY = var.FixedP1Dot1Y
else
//else dot1 must be the right dot
var.P1LeftDotX = var.FixedP1Dot1X - var.P1DistBtwDots //simulate left dot
var.P1LeftDotY = var.FixedP1Dot1Y
var.P1RightDotX = var.FixedP1Dot1X
var.P1RightDotY = var.FixedP1Dot1Y
endif

var.P1LastMidpointX = (var.P1LeftDotx + var.P1RightDotx)/2
var.P1PointedOnScreen = True

elseif wiimote1.dot2vis and (var.P1DistBtwDots > 0) then
//Only dot2 is visible, so we'll calculate a position for dot1
// Note, (var.P1DistBtwDots > 0) will be true as long as both dots have
// been visable at least once.

//Figure out if this is the left or the right dot
if (var.FixedP1Dot2X < var.P1LastMidpointX) then
//dot2 must be the left dot
var.P1LeftDotX = var.FixedP1Dot2X
var.P1LeftDotY = var.FixedP1Dot2Y
var.P1RightDotX = var.FixedP1Dot2X + var.P1DistBtwDots //simulate right dot
var.P1RightDotY = var.FixedP1Dot2Y
else
//else dot2 must be the right dot
var.P1LeftDotX = var.FixedP1Dot2X - var.P1DistBtwDots //simulate left dot
var.P1LeftDotY = var.FixedP1Dot2Y
var.P1RightDotX = var.FixedP1Dot2X
var.P1RightDotY = var.FixedP1Dot2Y
endif

var.P1LastMidpointX = (var.P1LeftDotx + var.P1RightDotx)/2
var.P1PointedOnScreen = True

else // else no dots are visible
var.P1PointedOnScreen = False
endif
//debug=var.P1LeftDotX + "," + var.P1LeftDotY + " " + var.P1RightDotX + "," + var.P1RightDotY
//**************** End P1 Get Left and Right Sensor Bar Dots *****************


//************** P1 Calculate the MidPoint and assign Joystick input ****************
if var.P1PointedOnScreen then
//Calculate the midpoint of the sensor bar dots
var.P1MiddleDotX = (var.P1LeftDotx + var.P1RightDotx)/2
var.P1MiddleDotY = (var.P1LeftDoty + var.P1RightDoty)/2
//debug = var.P1MiddleDotX

//Since the mindpoint's range is approx 1/3 of the ranges of the original
// 2 dots, fix the range of the MidPoint's X value by multiplying by 3.
// Note, I didn't do any fancy math to figure this out, I just watched
// "debug = var.P1MiddleDotX" as I moved the WiiMote left and right. I think
// the 1/3 could change depending on the size of your sensor bar and how near/far
// it is from the WiiMote.
var.P1MiddleDotX = var.P1MiddleDotX * var.MidpointMultiplierX

//Apply sensitivity multipliers
var.P1MiddleDotX = var.P1MiddleDotX * var.SensitivityX
var.P1MiddleDotY = var.P1MiddleDotY * var.SensitivityY

//Keep values within allowable joystick range
If var.P1MiddleDotX > 1 Then var.P1MiddleDotX = 1
If var.P1MiddleDotX < -1 Then var.P1MiddleDotX = -1
If var.P1MiddleDotY > 1 Then var.P1MiddleDotY = 1
If var.P1MiddleDotY < -1 Then var.P1MiddleDotY = -1

//Flip the Y value, since joystick Y input is always reversed
var.P1MiddleDotY = var.P1MiddleDotY * -1

PPJoy1.Analog0 = var.P1MiddleDotX
PPJoy1.Analog1 = var.P1MiddleDotY
//debug = var.P1MiddleDotX + "," + var.P1MiddleDotY
endif
//************ End P1 Calculate the MidPoint and assign Joystick input **************


//*********** P2 Process WiiMote Home button and set WiiMote LED's *************
//Normally Led 2 is lit to indicate this is wiimote #2,
// but when Home button is pressed the LED's display battery charge
if Pressed(wiimote2.home) then //Do this once when the button is first pressed
//Calculate and display battery charge %, full battery is 0xC0 (192)
var.P2Battery = Round( 100*wiimote2.battery/192 )
Say "Battery at " + var.P2Battery + " percent"
endif
if wiimote2.home then
var.P2Flash = !var.P2Flash
wiimote2.Led1 = var.P2Flash
If var.P2Battery > 35 then
wiimote2.Led2 = var.P2Flash
else
wiimote2.Led2 = False
endif
If var.P2Battery > 60 then
wiimote2.Led3 = var.P2Flash
else
wiimote2.Led3 = false
endif
If var.P2Battery > 85 then
wiimote2.Led4 = var.P2Flash
else
wiimote2.Led4 = false
endif
wait 100 ms //Increasing this will slow down the LED flash speed
else
wiimote2.Led1 = False
wiimote2.Led2 = True
wiimote2.Led3 = False
wiimote2.Led4 = False
endif
//*********** End P2 WiiMote Home button and set WiiMote LED's *************


//**************************** P2 Button Inputs *****************************
// (see above for Home button behavior)
//mouse.LeftButton = wiimote2.B
key.A = wiimote2.B
key.S = wiimote2.A
key.Two = wiimote2.Plus
key.Six = wiimote2.Minus
key.P = wiimote2.Down
key.left= wiimote2.left
key.right= wiimote2.right
//************************** End P2 Button Inputs ***************************


//********************** P2 Pre-Process Sensor Bar Dots ***********************
//For each sensor bar dot:
//1) Convert the sensor bar dots from the wiimote's range of values to a standard
// four quadrant setup with the origin (0,0) in the center. This is needed for
// the rotation formula in #2.
//2) Do roll compensation for both dots by running them through rotation formula.
//3) Convert the dots to standard joystick input range (-1 to +1)
//Note: #3 must happen AFTER #2. The native sensor bar dot ranges have the X
// and Y ranges at a ratio of about 4:3. Since #3 stretches the Y out and makes
// the ratio 1:1, we have to do this after #2, otherwise it will skew the
// rotation formula.

//get the WiiMote's Roll degrees once
var.P2Angle = -1 * smooth(wiimote2.smoothroll, 5, 5)

//dot1
if wiimote2.dot1vis then

//Shift the dot1 so that its range starts at 0.
// Note, this will only have an effect if you adjust the borders of the
// target area at the top of the script (i.e. if you change them from 0's)
var.P2Dot1X = wiimote2.dot1x - var.BeginRangeX
var.P2Dot1Y = wiimote2.dot1y - var.BeginRangeY

//Reverse the X and Y values to make the coordinates standard
// Note: the WiiMote's dot coordinates are reversed (numbers get larger to
// the left and down), so I subtract them from the max X and Y values in
// order to flip them.
var.P2Dot1X = var.RangeSizeX - var.P2Dot1X
var.P2Dot1Y = var.RangeSizeY - var.P2Dot1Y

//Now adjust X and Y value ranges so that the origin (0,0) is in the center
// this is needed for the rotation formula below, because it rotates points
// around the origin.
var.P2Dot1X = var.P2Dot1X - (var.RangeSizeX/2)
var.P2Dot1Y = var.P2Dot1Y - (var.RangeSizeY/2)

//Compensate for roll; I used 2D rotation equations to rotate each
// dot around the origin. http://en.wikipedia.org/wiki/Rotation_(mathematics)
// Note: every web page I find on the formulas below said they are for
// clockwise rotation, but when I put in some test values, they actually
// rotate counter clockwise.
if var.P2Angle <> 0 then
var.FixedP2dot1X = cos(var.P2Angle)*var.P2dot1X - sin(var.P2Angle)*var.P2dot1Y
var.FixedP2dot1Y = sin(var.P2Angle)*var.P2dot1X + cos(var.P2Angle)*var.P2dot1Y
else
var.FixedP2dot1X = var.P2dot1X
var.FixedP2dot1Y = var.P2dot1Y
endif

//Now convert dot1's range to (-1 to +1)
// just used good old unit conversion math here
var.FixedP2Dot1X = var.FixedP2Dot1X * (2 / var.RangeSizeX)
var.FixedP2Dot1Y = var.FixedP2Dot1Y * (2 / var.RangeSizeY)
endif

//dot2
if wiimote2.dot2vis then

//Shift the dot2 so that its range starts at 0.
// Note, this will only have an effect if you adjust the borders of the
// target area at the top of the script (i.e. if you change them from 0's)
var.P2dot2X = wiimote2.dot2x - var.BeginRangeX
var.P2dot2Y = wiimote2.dot2y - var.BeginRangeY

//Reverse the X and Y values to make the coordinates standard
// Note: the WiiMote's dot coordinates are reversed (numbers get larger to
// the left and down), so I subtract them from the max X and Y values in
// order to flip them.
var.P2dot2X = var.RangeSizeX - var.P2dot2X
var.P2dot2Y = var.RangeSizeY - var.P2dot2Y

//Now adjust X and Y value ranges so that the origin (0,0) is in the center
// this is needed for the rotation formula below, because it rotates points
// around the origin.
var.P2dot2X = var.P2dot2X - (var.RangeSizeX/2)
var.P2dot2Y = var.P2dot2Y - (var.RangeSizeY/2)

//Compensate for roll; I used 2D rotation equations to rotate each
// dot around the origin. http://en.wikipedia.org/wiki/Rotation_(mathematics)
// Note: every web page I find on the formulas below said they are for
// clockwise rotation, but when I put in some test values, they actually
// rotate counter clockwise.
if var.P2Angle <> 0 then
var.FixedP2dot2X = cos(var.P2Angle)*var.P2dot2X - sin(var.P2Angle)*var.P2dot2Y
var.FixedP2dot2Y = sin(var.P2Angle)*var.P2dot2X + cos(var.P2Angle)*var.P2dot2Y
else
var.FixedP2dot2X = var.P2dot2X
var.FixedP2dot2Y = var.P2dot2Y
endif

//Now convert dot2's range to (-1 to +1)
// just used good old unit conversion math here
var.FixedP2dot2X = var.FixedP2dot2X * (2 / var.RangeSizeX)
var.FixedP2dot2Y = var.FixedP2dot2Y * (2 / var.RangeSizeY)

endif
//******************** End P2 Pre-Process Sensor Bar Dots *********************


//****************** P2 Get Left and Right Sensor Bar Dots ********************
if wiimote2.dot1vis and wiimote2.dot2vis then
//Both sensor bar dots are visible

//Figure out which sensor bar dot is left and which is right
if var.FixedP2Dot1X < var.FixedP2Dot2X then
//the left dot must be dot1, and the right dot must be dot2
var.P2LeftDotX = var.FixedP2Dot1X
var.P2LeftDotY = var.FixedP2Dot1Y
var.P2RightDotX = var.FixedP2Dot2X
var.P2RightDotY = var.FixedP2Dot2Y
else
//else the left dot must be dot2, and the right dot must be dot1
var.P2LeftDotX = var.FixedP2Dot2X
var.P2LeftDotY = var.FixedP2Dot2Y
var.P2RightDotX = var.FixedP2Dot1X
var.P2RightDotY = var.FixedP2Dot1Y
endif

var.P2LastMidpointX = (var.P2LeftDotx + var.P2RightDotx)/2
var.P2PointedOnScreen = True

//Save the previous distance (for use in the safety check below)
var.OldP2DistBtwDots = var.P2DistBtwDots

//Whenever both dots are visible calculate the distance between them
var.P2DistBtwDots = var.P2RightDotx - var.P2LeftDotx

//Make sure one of the dots didn't just disappear; if it did then
//throw away this data. After a dot has just disappeared and has
// stopped updating its X value, it may still register as visible
// for a split second; I've seen this cause the distance to be
// recorded at around 30. Weird.
if !(wiimote2.dot1vis and wiimote2.dot2vis) then
var.P2DistBtwDots = var.OldP2DistBtwDots
var.P2PointedOnScreen = false
endif

elseif wiimote2.dot1vis and (var.P2DistBtwDots > 0) then
//Only dot1 is visible, so we'll calculate a position for dot2
// Note, (var.P2DistBtwDots > 0) will be true as long as both dots have
// been visable at least once.

//Figure out if this is the left or the right dot
if (var.FixedP2Dot1X < var.P2LastMidpointX) then
//dot1 must be the left dot
var.P2LeftDotX = var.FixedP2Dot1X
var.P2LeftDotY = var.FixedP2Dot1Y
var.P2RightDotX = var.FixedP2Dot1X + var.P2DistBtwDots //simulate right dot
var.P2RightDotY = var.FixedP2Dot1Y
else
//else dot1 must be the right dot
var.P2LeftDotX = var.FixedP2Dot1X - var.P2DistBtwDots //simulate left dot
var.P2LeftDotY = var.FixedP2Dot1Y
var.P2RightDotX = var.FixedP2Dot1X
var.P2RightDotY = var.FixedP2Dot1Y
endif

var.P2LastMidpointX = (var.P2LeftDotx + var.P2RightDotx)/2
var.P2PointedOnScreen = True

elseif wiimote2.dot2vis and (var.P2DistBtwDots > 0) then
//Only dot2 is visible, so we'll calculate a position for dot1
// Note, (var.P2DistBtwDots > 0) will be true as long as both dots have
// been visable at least once.

//Figure out if this is the left or the right dot
if (var.FixedP2Dot2X < var.P2LastMidpointX) then
//dot2 must be the left dot
var.P2LeftDotX = var.FixedP2Dot2X
var.P2LeftDotY = var.FixedP2Dot2Y
var.P2RightDotX = var.FixedP2Dot2X + var.P2DistBtwDots //simulate right dot
var.P2RightDotY = var.FixedP2Dot2Y
else
//else dot2 must be the right dot
var.P2LeftDotX = var.FixedP2Dot2X - var.P2DistBtwDots //simulate left dot
var.P2LeftDotY = var.FixedP2Dot2Y
var.P2RightDotX = var.FixedP2Dot2X
var.P2RightDotY = var.FixedP2Dot2Y
endif

var.P2LastMidpointX = (var.P2LeftDotx + var.P2RightDotx)/2
var.P2PointedOnScreen = True

else // else no dots are visible
var.P2PointedOnScreen = False
endif
//debug=var.P2LeftDotX + "," + var.P2LeftDotY + " " + var.P2RightDotX + "," + var.P2RightDotY
//**************** End P2 Get Left and Right Sensor Bar Dots *****************


//************** P2 Calculate the MidPoint and assign Joystick input ****************
if var.P2PointedOnScreen then
//Calculate the midpoint of the sensor bar dots
var.P2MiddleDotX = (var.P2LeftDotx + var.P2RightDotx)/2
var.P2MiddleDotY = (var.P2LeftDoty + var.P2RightDoty)/2
//debug = var.P2MiddleDotX

//Since the mindpoint's range is approx 1/3 of the ranges of the original
// 2 dots, fix the range of the MidPoint's X value by multiplying by 3.
// Note, I didn't do any fancy math to figure this out, I just watched
// "debug = var.P2MiddleDotX" as I moved the WiiMote left and right. I think
// the 1/3 could change depending on the size of your sensor bar and how near/far
// it is from the WiiMote.
var.P2MiddleDotX = var.P2MiddleDotX * var.MidpointMultiplierX

//Apply sensitivity multipliers
var.P2MiddleDotX = var.P2MiddleDotX * var.SensitivityX
var.P2MiddleDotY = var.P2MiddleDotY * var.SensitivityY

//Keep values within allowable joystick range
If var.P2MiddleDotX > 1 Then var.P2MiddleDotX = 1
If var.P2MiddleDotX < -1 Then var.P2MiddleDotX = -1
If var.P2MiddleDotY > 1 Then var.P2MiddleDotY = 1
If var.P2MiddleDotY < -1 Then var.P2MiddleDotY = -1

//Flip the Y value, since joystick Y input is always reversed
var.P2MiddleDotY = var.P2MiddleDotY * -1

PPjoy2.Analog0 = var.P2MiddleDotX
PPjoy2.Analog1 = var.P2MiddleDotY

endif
//************ End P2 Calculate the MidPoint and assign Joystick input **************


Todavia no he tenido la oportunidad de probar este script pero en cuanto tenga mi maquina acabada es una de las cosas que más me apetece. De todas manera,s este script necesita de otro programa llamado “Ppjoy” (configurado con 2 sticks virtuales). Su uso está muy bien explicado en este post de Mikonos.

tutoglovepiedisparar


- Leds, Rumble y Altavoz

Otra de las posibilidades de Glovepie mediante scripts es mandar "ordenes" al mando para controlar sus leds, los motores forcefeedback y el pequeño altavoz que lleva incorporado.

Si queremos encender o apagar alguno de los leds, simplemente le añadimos "= True" o "= False":

Wiimote.Led2 = True // esto encendería la segunda led del mando.

Así mismo, podemos hacer que el mando vibre asignándole una tecla del teclado o botones del Wiimote: Wiimote.Rumble = ctrl (cuando apretemos la tecla control el mando vibra). Si tenemos esto en cuenta y le damos el valor del “botón A” - Wiimote.rumble = A (cuando pulsemos el botón a del Wiimote, además de realizar la acción espada o disparo del juego, vibrará).

Una de las últimas cosas que han sido implementadas en las versiones de GlovePIE ha sido el micro del Wiimote. Por ahora su uso es limitado, creo que se podrán hacer cosas interesantes en el futuro.

A modo de ejemplo dejo un script del propio desarollador de la aplicación, que hace que suene un ruido pulsando el “botón A” pudiendo cambiar el volumen con los “botones +/-“ y detenerlo pulsando el “botón B”:

SPOILER (click to view)
// Carl Kenner's Wiimote Speaker Test script! Version 2
// A = start sound, B = stop sound
// Minus = decrease sample frequency
// Plus = increase sample frequency
// It takes a short time to start (due to delays built into Poke)

// Change the next line to set the rate at which sound data is sent
// BUT it must be low enough for the wiimote to respond to the B button
// it may depend on your PC speed. Must be at least 91 for freq 13.
pie.FrameRate = 120 Hz

if not var.initialized then
var.freq = 13 // Set sample rate = 3640 Hz (so computer can keep up)
var.volume = 0x40 // volume = 40 ??? Seems to be about max
debug = var.freq
var.initialized = true
end if

if var.On and (not Wiimote.One) and (not Wiimote.Two) then
// Report 18, send 20 bytes, square wave, 1/4 sample rate freq
WiimoteSend(1, 0x18, 20 shl 3, 0xCC,0x33,0xCC,0x33,0xCC,0x33,0xCC,0x33,0xCC,0x33, 0xCC,0x33,0xCC,0x33,0xCC,0x33,0xCC,0x33,0xCC,0x33)
else if var.On and Wiimote.One then
// Report 18, send 20 bytes, square wave, 1/2 sample rate freq
WiimoteSend(1, 0x18, 20 shl 3, 0xC3,0xC3,0xC3,0xC3,0xC3,0xC3,0xC3,0xC3,0xC3,0xC3, 0xC3,0xC3,0xC3,0xC3,0xC3,0xC3,0xC3,0xC3,0xC3,0xC3)
else if var.On and Wiimote.Two then
// Report 18, send 20 bytes, square wave, 1/8 sample rate freq
WiimoteSend(1, 0x18, 20 shl 3, 0xCC,0xCC,0x33,0x33,0xCC,0xCC,0x33,0x33,0xCC,0xCC, 0x33,0x33,0xCC,0xCC,0x33,0x33,0xCC,0xCC,0x33,0x33)
end if


if pressed(Wiimote.A) then
// Enable Speaker
Wiimote.Report14 = 0x04 | Int(Wiimote.Rumble)
// Mute Speaker
Wiimote.Report19 = 0x04 | Int(Wiimote.Rumble)
// Write 0x01 to register 0xa20009
WiimotePoke(1, 0x04a20009, 0x01)
// Write 0x08 to register 0xa20001
WiimotePoke(1, 0x04a20001, 0x08)
// Write 7-byte configuration to registers 0xa20001-0xa20008
WiimotePoke(1, 0x04a20001, 0x00)
WiimotePoke(1, 0x04a20002, 0x00)
WiimotePoke(1, 0x04a20003, 0x00)
WiimotePoke(1, 0x04a20004, var.freq)
WiimotePoke(1, 0x04a20005, var.volume) // 40
WiimotePoke(1, 0x04a20006, 0x00)
WiimotePoke(1, 0x04a20007, 0x00)
// Write 0x01 to register 0xa20008
WiimotePoke(1, 0x04a20008, 0x01)
// Unmute speaker
Wiimote.Report19 = 0x00 | Int(Wiimote.Rumble)
var.On = true
end if

if pressed(Wiimote.B) then
var.On = false
Wiimote.Report19 = 0x04 | Int(Wiimote.Rumble) // Mute Speaker
Wiimote.Report14 = 0x00 | Int(Wiimote.Rumble) // Disable speaker
end if

if pressed(Wiimote.Plus) then
var.freq--
debug = var.freq
// Mute Speaker
Wiimote.Report19 = 0x04 | Int(Wiimote.Rumble)
// Write 0x01 to register 0xa20009
WiimotePoke(1, 0x04a20009, 0x01)
// Write 0x08 to register 0xa20001
WiimotePoke(1, 0x04a20001, 0x08)
// Write 7-byte configuration to registers 0xa20001-0xa20008
WiimotePoke(1, 0x04a20001, 0x00)
WiimotePoke(1, 0x04a20002, 0x00)
WiimotePoke(1, 0x04a20003, 0x00)
WiimotePoke(1, 0x04a20004, var.freq) // max volume?
WiimotePoke(1, 0x04a20005, var.volume)
WiimotePoke(1, 0x04a20006, 0x00)
WiimotePoke(1, 0x04a20007, 0x00)
// Write 0x01 to register 0xa20008
WiimotePoke(1, 0x04a20008, 0x01)
// Unmute speaker
Wiimote.Report19 = 0x00 | Int(Wiimote.Rumble)
end if

if pressed(Wiimote.Minus) then
var.freq++
debug = var.freq
// Mute Speaker
Wiimote.Report19 = 0x04 | Int(Wiimote.Rumble)
// Write 0x01 to register 0xa20009
WiimotePoke(1, 0x04a20009, 0x01)
// Write 0x08 to register 0xa20001
WiimotePoke(1, 0x04a20001, 0x08)
// Write 7-byte configuration to registers 0xa20001-0xa20008
WiimotePoke(1, 0x04a20001, 0x00)
WiimotePoke(1, 0x04a20002, 0x00)
WiimotePoke(1, 0x04a20003, 0x00)
WiimotePoke(1, 0x04a20004, var.freq) // max volume?
WiimotePoke(1, 0x04a20005, var.volume)
WiimotePoke(1, 0x04a20006, 0x00)
WiimotePoke(1, 0x04a20007, 0x00)
// Write 0x01 to register 0xa20008
WiimotePoke(1, 0x04a20008, 0x01)
// Unmute speaker
Wiimote.Report19 = 0x00 | Int(Wiimote.Rumble)
end if


- Programación del Nunchuk

GlovePIE, aparte de soportar el Wiimote, también soporta el “Nunchuk” (además de la wii balance board y el mando clásico). Es decir, el “addon” principal del Wiimote, programarlo es también muy sencillo, es casi igual que el Wiimote pero cambiando los nombres. Vamos a ver sus botones y valores.

nunchuck

Joystick
Wiimote.Nunchuk.JoyY = Eje Y
Wiimote.Nunchuk.JoyX = Eje X


Botones
Nunchuk.ZButton = Z
Nunchuk.CButton = C

Al igual que con el Wiimote, Glovepie es capaz de utilizar el acelerómetro del Nunchuk y así poder asignarle valores del teclado. Con el Nunchuck tenemos la posibilidad controlar todo tipo de juegos como si un juego de la Wii se tratase.

Ahora que sabemos programar tanto el Wiimote como el Nunchuck, os dejo el script que utilizaba para jugar al MAME con soporte 1/4 players, con la peculiaridad que el mando vibra cuando insertamos una moneda:

SPOILER (click to view)
// Lasthome script for MAME32
// 1 - 4 players

// Player 1

// Right
if 2 > Wiimote1.Nunchuk.JoyX > 0.4 then
Right = true
wait 60 ms
Right = false
endif
// Left
if -2 < Wiimote1.Nunchuk.JoyX < -0.4 then
left = true
wait 60 ms
left = false
endif
// Down
if 2 > Wiimote1.Nunchuk.JoyY > 0.4 then
down = true
wait 60 ms
down = false
endif
// Up
if -2 < Wiimote1.Nunchuk.JoyY < -0.4 then
up = true
wait 60 ms
up = false
endif
key.LeftCtrl = Wiimote1.One // Button 1
key.LeftAlt = Wiimote1.Two // Button 2
key.5 = Wiimote1.Plus // Insert Coin
key.1 = Wiimote1.A // Player 1 Start
key.Enter = Wiimote1.Minus // Enter
key.P = Wiimote1.Home // Pause
key.1 = Wiimote1.A // Player 1 Start
Wiimote1.Led1 = 1 // Light the Remote 1 LED
key.F3 = Wiimote1.Plus + Wiimote1.Minus // Soft Reset
ESC = Wiimote1.B + Wiimote1.A // Exit MAME

// Player 2

// Right
if 2 > Wiimote2.Nunchuk.JoyX > 0.4 then
key.G = true
wait 60 ms
key.G = false
endif
// Left
if -2 < Wiimote2.Nunchuk.JoyX < -0.4 then
key.D = true
wait 60 ms
key.D = false
endif
// Down
if 2 > Wiimote2.Nunchuk.JoyY > 0.4 then
key.F = true
wait 60 ms
key.F = false
endif
// Up
if -2 < Wiimote2.Nunchuk.JoyY < -0.4 then
key.R = true
wait 60 ms
key.R = false
endif
key.A = Wiimote2.One // Button 1
key.S = Wiimote2.Two // Button 2
key.6 = Wiimote2.Plus // Insert Coin
key.2 = Wiimote2.A // Player 2 Start
key.Enter = Wiimote2.Minus // Enter
key.P = Wiimote2.Home // Pause
Wiimote2.Led2 = 1 // Light the Remote 2 LED
key.F3 = Wiimote2.Plus + Wiimote2.Minus // Soft Reset
ESC = Wiimote2.B + Wiimote2.A // Exit MAME

// Player 3

// Right
if 2 > Wiimote3.Nunchuk.JoyX > 0.4 then
key.L = true
wait 60 ms
key.L = false
endif
// Left
if -2 < Wiimote3.Nunchuk.JoyX < -0.4 then
key.J = true
wait 60 ms
key.J = false
endif
// Down
if 2 > Wiimote3.Nunchuk.JoyY > 0.4 then
key.K = true
wait 60 ms
key.K = false
endif
// Up
if -2 < Wiimote3.Nunchuk.JoyY < -0.4 then
key.I = true
wait 60 ms
key.I = false
endif
key.RightControl = Wiimote3.One // Button 1
key.RightShift = Wiimote3.Two // Button 2
key.7 = Wiimote3.Plus // Insert Coin
key.3 = Wiimote3.A // Player 3 Start
key.Enter = Wiimote3.Minus // Enter
key.P = Wiimote3.Home // Pause
Wiimote3.Led3 = 1 // Light the Remote 2 LED
key.F3 = Wiimote3.Plus + Wiimote3.Minus // Soft Reset
ESC = Wiimote3.B + Wiimote3.A // Exit MAME

// Player 4

// Right
if 2 > Wiimote4.Nunchuk.JoyX > 0.4 then
key.NUMPAD4 = true
wait 60 ms
key.NUMPAD4 = false
endif
// Left
if -2 < Wiimote4.Nunchuk.JoyX < -0.4 then
key.NUMPAD6 = true
wait 60 ms
key.NUMPAD6 = false
endif
// Down
if 2 > Wiimote4.Nunchuk.JoyY > 0.4 then
key.NUMPAD2 = true
wait 60 ms
key.NUMPAD2 = false
endif
// Up
if -2 < Wiimote4.Nunchuk.JoyY < -0.4 then
key.NUMPAD8 = true
wait 60 ms
key.NUMPAD8 = false
endif
key.NUMPAD0 = Wiimote4.One // Button 1
key.NumPadDot = Wiimote4.Two // Button 2
key.8 = Wiimote4.Plus // Insert Coin
key.4 = Wiimote4.A // Player 4 Start
key.Enter = Wiimote4.Minus // Enter
key.P = Wiimote4.Home // Pause
Wiimote4.Led4 = 1 // Light the Remote 2 LED
key.F3 = Wiimote4.Plus + Wiimote4.Minus // Soft Reset
ESC = Wiimote4.B + Wiimote4.A // Exit MAME

// Vibrate when inserting a coin
if (Wiimote1.Plus) then
Wiimote1.Rumble = 1
wait 100ms
Wiimote1.Rumble = 0
wait 500ms
end if

if (Wiimote2.Plus) then
Wiimote2.Rumble = 1
wait 100ms
Wiimote2.Rumble = 0
wait 500ms
end if

if (Wiimote3.Plus) then
Wiimote3.Rumble = 1
wait 100ms
Wiimote3.Rumble = 0
wait 500ms
end if

if (Wiimote4.Plus) then
Wiimote4.Rumble = 1
wait 100ms
Wiimote4.Rumble = 0
wait 500ms
end if


¡Con juegos como el “Sunset Riders”, “Las Tortugas Ninja” o los “Dungeons and Dragons” podremos echar unos vicios de escándalo!!!

tutoglovepieplanca


- Por lasthome -

Edited by Mikonos - 6/8/2011, 18:20
 
Web  Top
view post Posted on 6/8/2011, 17:05     +1   -1
Avatar


Group:
Member
Posts:
64
Location:
Vitoria

Status:


y yo con la wii muerta de asco jejeje la voy a desarmar cagando leches!

gran tuto, muchas gracias lasthome
 
Top
rafa-usuario
view post Posted on 6/8/2011, 17:22     +1   -1


muy bueno
 
Top
view post Posted on 6/8/2011, 20:10     +1   -1


Group:
Member
Posts:
184

Status:


Gran tuto!!
 
Top
Maestrowhopper
icon1  view post Posted on 6/8/2011, 22:13     +1   -1


Absolutamente genial, gran tutorial amigo, te lo has currao de vicio, gracias
 
Top
flayxes
view post Posted on 6/8/2011, 23:03     +1   -1


que bien documentado este me lo apunto para los time crisis y los the house of the dead ;)
 
Top
view post Posted on 6/8/2011, 23:09     +1   -1
Avatar


Group:
Member
Posts:
771

Status:


Gracias compañeros por los comentarios y gracias a ti Mikonos por las nuevas imágenes y retoques. Espero que os sea de ayuda.

Feliz vicio!!!
 
Top
view post Posted on 7/8/2011, 03:13     +1   -1
Avatar


Group:
Member
Posts:
53
Location:
Madrid

Status:


Muy buena idea...

Está genial el trabajo realizado...

Esto ayuda a unir las nuevas ideas tecnológicas con nuestros sistemas arcade...

Gran aporte.

Un saludo.

 
Top
view post Posted on 7/8/2011, 05:43     +1   -1
Avatar


Group:
Member
Posts:
401
Location:
Concepcion, Chile

Status:


esta genial resolvio varias de mis dudas, pero aun si me gustaria saber si el glovepie soporta el control clasico de wii y si soporta efectivamente 4 controles de wii :D
 
Top
yadrax
view post Posted on 7/8/2011, 10:55     +1   -1


Estupendo tuto.
Muchas gracias Lasthome.
Si le metes mano a un script para los juegos tipo lightgun te levanto un monumento.
 
Top
kulebra
view post Posted on 7/8/2011, 22:36     +1   -1


Muchas gracias por el tutorial tronco, excelente aporte :D
 
Top
view post Posted on 8/8/2011, 02:20     +1   -1
Avatar


Group:
Member
Posts:
771

Status:


QUOTE (kiltrocrazy @ 7/8/2011, 06:43) 
esta genial resolvio varias de mis dudas, pero aun si me gustaria saber si el glovepie soporta el control clasico de wii y si soporta efectivamente 4 controles de wii :D

Sep glovepie soporta la mayoría de addons tanto el mando clásico, como la wii balanceboard así como el wii motion plus. Soporta 4 mandos (después de programación nunchuck hay un spoiler que contiene un script para 4 players) y en teoría debería soportar hasta 8 que es el máximo de conexiones simultaneas que puede soportar un adaptador de bluetooth para PC.

QUOTE (yadrax @ 7/8/2011, 11:55) 
Estupendo tuto.
Muchas gracias Lasthome.
Si le metes mano a un script para los juegos tipo lightgun te levanto un monumento.

De hecho ya lo tienes en el tutorial después del apartado programación IR hay un script (pulsa el botón spoiler) basado en el juego Operation Wolf de MAME pero puede ser usado para cualquier juego en el que se necesite una lightgun.

QUOTE (kulebra @ 7/8/2011, 23:36) 
Muchas gracias por el tutorial tronco, excelente aporte :D

Me alegro que te guste. Yo estoy esperando que des por terminado tu tutorial de "visual boy advance", ya me lo he leído y es muy exhaustivo me gusta como lo has estructurado y analizado aspecto por aspecto.

Feliz vicio!!!
 
Top
yadrax
view post Posted on 8/8/2011, 13:26     +1   -1


Cierto lo del script, ni lo habia visto!!.
Yo estoy acostumbro a funcionar con el wiiremote pero me atrae lo del glovepie por el tema de usar mas de un mando de wii.
Se que ya es salirse un poco de este post, pero pone que hace falta el ppjoy para hacer funcionar este experimento con estos juegos tipo lightgun. Conozco el ppjoy pero no se a como se supone que hay que utilizarlo en este caso. Si algun dia tienes tiempo y ganas te invito a una birra si me lo explicas.
Muchas gracias amigo.
 
Top
view post Posted on 8/8/2011, 13:52     +1   -1
Avatar


Group:
Member
Posts:
771

Status:


QUOTE (yadrax @ 8/8/2011, 14:26) 
Cierto lo del script, ni lo habia visto!!.
Yo estoy acostumbro a funcionar con el wiiremote pero me atrae lo del glovepie por el tema de usar mas de un mando de wii.
Se que ya es salirse un poco de este post, pero pone que hace falta el ppjoy para hacer funcionar este experimento con estos juegos tipo lightgun. Conozco el ppjoy pero no se a como se supone que hay que utilizarlo en este caso. Si algun dia tienes tiempo y ganas te invito a una birra si me lo explicas.
Muchas gracias amigo.

El ppjoy esta incluido en este script para hacer funcionar el joystick: configurarlo es facilisimo en este caso, se instala, se crean dos joysticks vituales y se dejan los valores por defecto, practicamente no hay que tocar nada ;P
 
Top
killo kabuto
view post Posted on 8/8/2011, 19:14     +1   -1


Excelente tarbajo y tutorial

Si tengo algo de tiempo esta noche me pongo con esto, y si es realmente sencillo, igual hasta lo consigo...

Gracias y un saludo.

Una duda, yo uso ppjoy para el cpo y botones aux, este creo que queda residente para funcionar la configuración, ¿no interferirá el script con el residente?
 
Top
25 replies since 6/8/2011, 16:16   8072 views
  Share